<p>Is your home in need of a make-over, a simple coat of paint can brighten your home and give it a new outlook. A good paint job can only improve your home’s value, while a poor one will leave you poorer and needing to redo it.<br />
<strong>Here are five tips that you need to follow for a successful Do-It-Yourself (DIY) home painting:</strong><br />
<strong>Tip Number One – Remove All Fixtures</strong><br />
Before starting to paint your home, ensure that you remove all paintings, nails, plugs, light fixtures and other hanging objects from the walls and ceiling. Ensure that they are keep in a safe place so that you are able to reuse them at a later stage.<br />
Remember to tape up objects like plug out-lets that you do not want to remove from the walls, this will prevent the inevitable paint stipe on the plug, as a constant reminder of your slip up.<br />
<strong><br />
Tip Number Two – Prepare The Walls</strong><br />
Once you have removed all items of the walls, you need to prepare the surface for painting. Fill all holes in the wall with polyfilla and leave to dry (it should dry within an hour or two).<br />
Once the polyfilla is set, take a piece of sandpaper and gently rub over the entire wall, ensuring that the surface is completely smooth. The next step is to take a damp cloth and wipe the surface down, as this removes all dust particles sticking to the wall. Once again, wait until the wall is completely dry before starting to paint.<br />
<strong>Tip Number Three – Protect Your Paint Brushes</strong><br />
Remember to use soft gentle strokes when painting the walls, and in-between coats to wash carefully in cold water. Do not let the paint brush sit in thinners or water, as this will damage the bristles and leave your walls with a scratchy, and not smooth, surface.<br />
<strong>Tip Number Four – Keep A Damp Rag</strong><br />
Always keep a damp rag with you to wipe up any paint spills that may occur. The rag should be dipped in a solution of water and solvent for the type of paint that you are using.<br />
Remember that this rag needs only be damp and should not drip onto the wall at any time, as it is designed to remove the paint off the surface and it could potentially leave the wall will an odd strip when dry.<br />
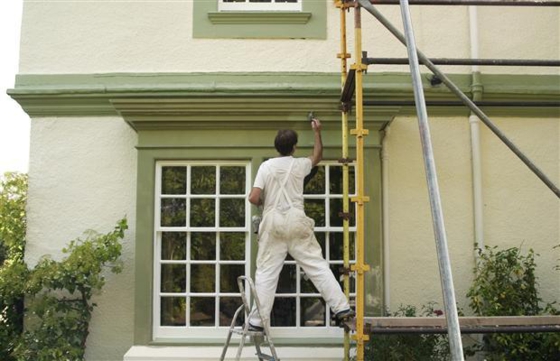
<strong>Tip Number Five – The Painting</strong><br />
When painting a wall you need to remember that the wall is painted in two steps: the first step is to paint the edges, or skirting, of the walls. Do not paint too deep into the wall, as it will dry faster than the rest of the wall. The second step is to use a roller on the remainder of the wall. Remember to take long strokes and even stroke, as this will ensure that the paint is spread evenly over the wall. Evenly spread paint dries at the same rate and also ensures that the wall stays one colour.<br />
In conclusion, ensure that you follow these five tips when painting your home. When in doubt as a buddy to help you, it will double the level of fun you have and half the amount of work.<br />
I am Greg Jones, a property consultant. I recently renovated my house and needed a home loan to help pay for it, but in the end the value of my house increase by over thirty percent. It was completely worth the drama of living in a messy home for nearly two months.</p>

Tips On Painting Your Home