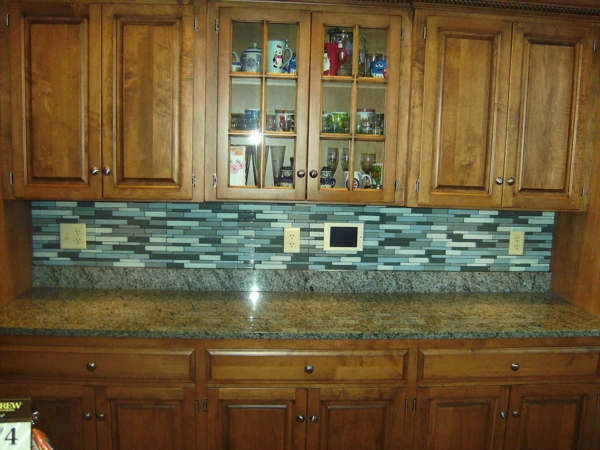
<p>How to Install a Glass Tile Backsplash<br />
There is no doubt that a glass tile backsplash can indeed look fantastic. No worries, installing it should actually be a much easier job than you may at first realize. All that will be required from you is some DIY knowledge and a steady hand. The following tips may help to make things a little bit easier for you as well.<br />
To begin with, you should lay out the glass tile backsplash on a worktop so you can check the design and know how much space it is going to take up. This will also allow you to work out in advance the tiles that are going to have to be cut, so everything will be ready to go on the actual wall.<br />
The next step is to actually prepare the thin set mortar that acts as the adhesive. How much mortar you need to make depends on the size of the space you are covering. You will tend to find that the manufacturer of the mortar will have instructions as to how much needs to be mixed, so follow their directions closely. You want to be sure that the adhesive is strong enough to hold the tiles in place without falling off during installation, when they are hit with water after being installed, or compromised by any heat that may be in the room. The mortar then should be applied to the wall and only cover about 2 square feet at any given time, and leave grooves in the mortar as this helps the tile to stick better.<br />
When it comes to laying the tiles, always start from the bottom row and press the tiles quite firmly in place making sure it is level and straight. Use plastic spacers between the tiles and work your way along the row before working your way up the wall adding in any decorative features as you go.<br />
Cutting the tile can be done manually using a Rubi cutter. This involves measuring the tile and scoring it before the cutter snaps it off at the correct part. One thing that should be mentioned is that if the cut end of the tile is going to be exposed, then consider polishing it off to make it rounded and neater rather than being faced with a rough edge. This can make an otherwise tidy job look horrible.<br />
The final part is to then grout the tiles once they are set into place. As they do set, remove the spacers that you have been putting in along the way. Always use unsanded grout as this will stop the tiles from being scratched. Press lightly against the tiles so the grout is forced into the gaps but the tiles themselves are not pushed back against the wall. Once the grout has been applied wipe the tiles clean and then allow everything to dry for the finished job.<br />
After the job has been completed you should be quite happy with the end result. There are a whole host of colors and designs available so just take your time in selecting the one you like and really create a beautiful design for your wall.<br />
This article was brought to you by Tina, a contributor for Floor and Decor Outlets. Floor and Decor offers affordable prices on materials for a glass tile backsplash, mosaics, and other flooring options.</p>

How To Install A Glass Tile Backsplash